Creating a Gravity-Fed Water Filter for Jesmonite AC100 in 6 Steps
- heykiddoco
- Jun 9, 2021
- 6 min read
Working with Jesmonite can be messy business. The chalky powder, stains from the pigments, cleaning your moulds - but what about the water you use?
When wet-dry sanding Jesmonite, you may notice a sludgy, silt-like material build up as you sand. If you're a terrazzo designer like me, you will do your fair share of wet-dry sanding, shaving off layers of Jesmonite to reveal the terrazzo design beneath the surface. This Jesmonite dust, or microparticulates, enters the environment and the water you use for sanding.

While qualifying as an eco-resin, this Jesmonite sanding dust is still harmful to our environment and water supplies. It is always important to correctly dispose of any by-products you generate when crafting and that it is especially true when disposing of water which contains Jesmonite.
Jesmonite is an acrylic resin, therefore you are releasing microplastics into our waters. You also need to be especially weary of that dusting sludge as it can clog up your drains and damage your pipe networks.
Jesmonite is still an environmentally-friendly material, you can read more about the green manufacturing processes behind Jesmonite in my post, What Is Jesmonite? However, as a responsible creative, it's important to instil some of those green practices into how you work and operate, the onus is not just on Jesmonite to make sure our products are eco-friendly and safe for our environment.

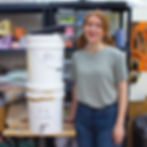
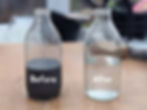
I built my own gravity-fed water filter at the start of January 2021 and have so far filtered over 200 litres of dirty water. 200 litres of dirty water that has not entered our water supplies or damaged our water networks. It really is simple and easy to build your own water filter. I have done all the research for you, including which products to purchase, and provided it in this free 6 step guide. If you have any issues or queries regarding setting up your own, please contact me, Lucy, heykiddocompany@gmail.com.
What You'll Need
1x large bucket with lid for 'clean' water
1x large bucket for 'dirty' water
Spigot
Large funnel
Guppy Friend Wash Bag (~50 micron filter)
Ceramic water filter (0.5 micron filter minimum)
Drill
1. Prepare your buckets
For my filter, I have used two of the 25kg Jesmonite powder buckets (I'd always recommend reusing plastics instead of purchasing virgin plastics). You will want a bucket around this size as they can hold a large volume of water.
You also want to ensure that your two buckets are approximately the same size. This way, you can stack them easily.
Your clean bucket must have a lid as this is how the two buckets will sit atop one another and also where you will attach your filter.
Feel free to write 'clean' and 'dirty' on your buckets so you don't mix them up. Ensure that both buckets have been thoroughly cleaned before you begin.

2. Attach your spigot to your 'clean' bucket
Take your 'clean' bucket and measure out a distance near the base of the bucket where you wish to connect your spigot. Remember, your bucket will fill from the bottom, by placing your spigot near the base you'll be able to access the clean water more readily.
I keep my filter off the ground so I can open the spigot and pour out the water, I would recommend keeping it on a stool or raised surface so that you can easily access the water once it has been filtered.
Match your drill bit to the size of the spigot and drill a hole straight through your 'clean' bucket near the base. Securely attach your spigot to ensure the water will not leak.
At this point, I tested my spigot by filling the bucket slightly with water and opening and closing the valve. Ensure you keep your spigot closed so that your filtered water doesn't pour straight out.
3. Drill a hole through the 'clean' bucket's lid and 'dirty' bucket's base
Next you'll want to place the lid on your 'clean' bucket and 'dirty' bucket on top of the lid. You're going to drill straight through the base of the 'dirty' bucket and the lid of the 'clean' bucket to insert your ceramic filter.
Match your drill bit with the size of your filter and drill straight through the base and the lid. The hole should be big enough that your filter can fit securely inside.
4. Attach Your Ceramic Filter
Your ceramic filter must be able to filter at least 0.5 microns. This is the minimum you should go to in order to filter microparticulates and microplastics from your water.
I purchased these British Berkefeld Super Sterasyl Ceramic Candles from Wrekin Water. They work by pulling the dirty water through the white chalky candle, filtering and cleaning the waste in the water and releasing the cleaned water through the black nozzle.
Gravity pulls the water through the filter, where it is processed by layers of various filtration systems inside the candle. This is why it is important to get 0.5 micron or below, that number indicates the size of the particles your filter will be able to separate. 0.5 is the minimum for filtering out microplastics.
Insert your filter into the hole you drilled on the 'dirty' bucket and 'clean' lid and tighten the nut. You want to ensure this is tightly secured as you don't want any water to contaminate between the two buckets.
With your 0.5 micron filter attached, simply attach the lid back on your 'clean' bucket.
5. Attach your Guppy Friend Wash Bag and funnel
I use a Guppy Friend Wash Bag to catch some of the sludge. This only offers 50 micron protection and you will notice the water pours straight through it. This is useful however, as your 'dirty' bucket starts to fill up, your Guppy Friend will gather a lot of the larger particles that start to build, preventing your 0.5 filter from getting clogged as quickly.
I simply fold the bag over the top of the 'dirty' bucket so that all water first has to go through the Guppy Friend before it goes through the ceramic filter.
Next, I place my large funnel on top of the bucket, this will make it a lot easier to get your dirty water into the bucket. If you're like me, you'll go through a lot of water so I pour it straight into the funnel to prevent it from splashing everywhere.
6. Using your filter and maintenance
The catch with a homemade gravity-fed water filters is, they aren't quick! It'll take a long time to filter your water, by which time your dirty bucket may already be full. I have a secondary large bucket I store excess water in and continue to top up my 'dirty' bucket every day.
You will need to clean your ceramic filter regularly in order for it to function correctly. The silt you find in the Jesmonite water, that can gather on the outside of your ceramic filter, so simply use a brush to gently move this away from the surface of the filter so it can continue to pull the water through.
After a few months, run your dirty water down, take your gravity-fed filtration system apart and clean each component once more. This is to prevent any unwanted bacteria from growing but also to make your filter last longer.
After cleaning my filter, I noticed a layer of dried Jesmonite at the base of the 'dirty' bucket. I did in fact try to turn this into terrazzo chips but I'm afraid the consistency was chalky and the smell was unpleasant. I would recommend disposing of any dried waste sludge you find inside your filter.

I upgraded my system recently to have two 0.5 micron candles in there to speed up the rate at which it filtered. I'd recommend doing this once you've gotten used to using yours regularly.
Why should you go to all this effort?
So why should you spend all this time, money and effort constructing your own gravity-fed filtration system? Well, put bluntly, to protect the environment. As creatives, it's imperative that we understand the consequences of everything we make. Everything has a by-product and it is your own responsibility to correctly dispose of those by-products.
Since making this filter I have had people tell me they pour their dirty Jesmonite water down the drain, the sink, the toilet. This article is not here to shame anyone whatsoever. This article is here to educate creatives into understanding how to safely dispose of their waste. If you are in a similar position, finding yourself unsure about what to do with your waste, then I hope you find this guide useful and you can continue to setup your creative business in a green, eco-friendly way.
